Thursday, September 26, 2013

Jackfruit Side Veneer Graft.

Side Veneer Grafting On Jackfruit.

Decided to try out Side Veneer grafting on the Jackfruit. Most of the rootstock is from the failed previous cleft grafting.

Reasons that I trying out side veneer is that
1) it may be easier to align the cambium layer.
2) we may extend the joint to a longer graft.
3) it may be easier to graft on different diameter.
4) it may be easier, less laborious to cut the rootstock and scion.


Young Jackfruit scion.
First I cut off the top to about 6 to 10 inches. It's easier to work with.
 Then I prepare the scion. Scion of about 6 to 10 inches is used. I am targeting a joint of 4 to 6 inches. I cut starting from the tip and splice it down. Had started to use new growth scion.

Jackfruit rootstock, side veneer grafting.

 Then I do a side cut by first cutting into the lower section of the rootstock like a side wedge. I go back from the top, do a side cut and stop as soon as I feel the that I've cut off the soft part, before the hard section. Splice this down until the lower cut.
Matching the Jackfruit scion to the Jackfruit rootstock.
 The lower tip of the scion is wedge shaped and inserted into the lower cut of the rootstock. I align the scion slightly for cambium contact.
Wrapping the side veneer Jackfruit graft.
 I start of the wrapping and realign along the way. I try to align as best a I can on one side, but sometimes if it is not straight, I shall cross it to the other side. Am reducing the wrapping pressure due to my previous experience and also in view of the young scion.
Finished Jackdfruit graft.
 Finishing off with a plastic bag and tie up to prevent it from blowing off. Keeping these in a shaded area, 90% Shade screen.
Storing my grafted Jackfruit trees.
 Some of the grafted trees.
My grafting position.
Doing grafting under shade. It's much cooler.


Over grown Jackfruit rootstock.

 The over grown roostock.
Add caption

Top deactivated.
 Cutting off the top.
Jackfruit rootstock.


Note the bud.


Cap the grafted Jackfruit with a plastic bag to prevent humidity lost.
 A not so straight scion.

Matching the length.

Matching up.

My view, under the citrus tree, doing side veneer grafting on Jackfruit.
Mid day now. Sun is getting pretty hot and almost directly over head. Time to move into the shade.

This time I did 8 trees on the scion taken from the Honey Jackfruit. The 4 new plants that I have. Hope they can grow more buds after this. Just for the fun of it I did 2 for the soursop :-)

Had done all I could before I go on leave. Shall be back end of the month. This time hope I can achieve my 30%. Stay tune.

Tuesday, September 24, 2013

Rescuing Our Soursop, Annona Muricata.

Our 1st batch of Soursop was planted back in April.

Propagating & Planting Soursop, Annona Muricata

Due to the raining, access road to that particular section was cut off. We had to wait for the bulldozer to come by and clear off the small land slide.
 Even with the bulldozer clearing that section, the surface is still soft & muddy. I went down to inspect the Soursop and found that they had been over ran with weeds as it's already about 5 months since we planted.

We managed to organize a recuse mission. As it had just rained the previous night, we have to park our truck about 0.8 km away and trek down to that section. Trekking down is easy, but bringing all our stuff is a bit of a handful.We then have to cross a small river before we reach that section.
We use parang (machetes) to slash off the weed and to locate the planted soursop. It wasn't too difficult as we had marked the plants with a small pole, covered with the discarded polybags. Those with fallen markers are the difficult to ones to locate. Thank goodness that I guess we only lost maybe less than 5 plants. There are also a couple of agarwood trees that we planted on the slope side. On the river side there are a couple of Berangan banana trees.

It took us about half a day to complete our task.

Trekking back is challenging as it's up hill.

We came back a couple of days later to do weed management with herbicide.
Going off for my break and shall check back next month. Stay tune for update.

Thursday, September 19, 2013

Top Clef Grafting Jackfruit 2

  Continue from

Top Clef Grafting Jackfruit

Came back to our little farm on the 30th August. Was very anxious to check out my Jackfruit grafting. This is the third time doing Jackfruit grafting. Once I collect and send off our produce to the market I proceed with the inspection.

Was disappointed as I see most of the graft dried off. The next few days was spent on analyzing why the graft did not 'take'. Took off a couple of the failed grafting. Started to redo on a go slow mode while trying to analyses what went wrong.

Most of the plastic bags covering the scion were blew off due to strong wind. Storage of the grafted trees where not shaded sufficiently. This caused the scion to dry out and die off. Being a tropical country, the sun here is extremely hot in the afternoon.

 I also notice in order to match the diameter of a medium rootstock, I find the scion to be quite hard and difficult to shape as it is 'woody'. I noticed the joint is not flat due to to the difficulty in shaping. This doesn't give a good cambium contact.


Went back to basic, the cambuim. Was the cambuim properly identify? Cambuim contact good?  
 
Source: http://www.uic.edu/classes/bios/bios100/lectf03am/
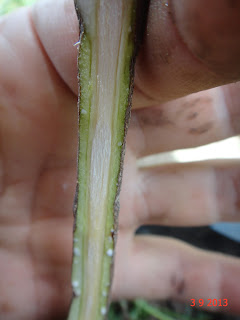
 Cut off some branches, rootstock and scion to inspect the cambium.

 Cambium is the layer just beneath the bark. Had identified that it's the thin translucent brown color layer. While studying these, I realized that my eyesight is not as good as it used to be. Must be due to my aging. Bought a magnifying glass to help. As Keningau is a small town, I only manged to buy a cheap 5 X magnifying glass.

Since am back to basic, why I wanted to graft Jackfruit? As I had identified Jackfruit grows in our local condition and is pretty drought resistance. Have 2 Jackfruit trees in our little farm and it only requires minimum care. Planning to propagate and plant Jackfruit on a small scale for it's fruit. Grafting can provide a good variety (clone) of planting stock and let it bear fruit earlier. Since I have 2 mother trees of J29 and J 32. Also had the 4 trees of J 33.

Next I have reorganize myself mentally. Grafting is not rocket science and had been done more that 2,000 years ago. I'm sure that I can do it successfully. My definition of successful is that I can emulate successful grafting of at least 85%. I shall most probably set a next target of 30% first as I'm still new in grafting.

Grafting should be easy, fun, non laborious and stress free. There should be a feel good factor as we are helping certain species to expand and propagate. It's creating more.

Decided to move out the agarwood seedlings to make way to store the grafted Jackfruits. As I have the section of the nursery repaired with a 90% shade. Also the agarwood is growing well and by moving it to another section of 70% shade helps on the 'hardening'. With the sufficiently shaded storage, hopefully it shall improve my successful rate. 

As for the hardwood being difficult to shape, was thinking that the scion can be of smaller diameter, younger thus easier to shape. While doing this, since the scion is a small diameter, why not cut the cleft off center according to the smaller size of the scion? Being off center, it can accommodate the the smaller size scion, yet matching the cambium on both sides.
Starting to wonder on the latex. Does the latex aid the cambium taking or does it creates a barrier and prevent? Notice that some have the scion and the grafting part had rotted. Some of the wrapped part died. Some bark grew uneven, bulge after wrapping. Am I applying to much pressure? Too much pressure and restrict the flow of nutrient? The scion died and the wrapped part also die and rot. Guess I shall reduce the pressure while wrapping.


After finishing off all the redo, I counted 12 that 'took' and a couples of 'maybe'. It was not as bad as I initially though. Thank goodness I fare better then the previous grafting. Even though it was not as what I targeted, I am grateful to have 12 new planting material. Just have to nurse these till they are good for field planting.

Summarize of my improvements
Keep grafted plants in a well shaded area. Water them if no rain for 3 days.
Plastic cover to keep the humidity high to be tie down, preventing them from blowing off.
Using newly developed scion and abstain from harden scion.Cut shaping shall be more flat and fit better.
Use a magnifying glass to help see better, hence able to match the cambium better.
Reduce wrapping pressure.
Thank goodness that I had managed to identify some of my short comings.

While redoing (after about 10 plants), I was pondering if there is a better chances of 'take'. After much research on the internet, I shall try out side veneer grafting, hopefully it shall improve my 'take'. Stay tune.